
Many Community-based organisations and Social justice organisations rely on free and open-source tools to support their work. Tools like Google Forms are readily available and easy to use for collecting public data. A Google form can be shared on websites and social media for access by anyone who wishes to submit information. However, the open-access nature of Google Forms often attracts spam submissions that can compromise data quality and waste resources. To minimise the likelihood of spam submissions, we recommend that CBOs and SJOs implement the following simple settings on their Google Forms:
- Require users to sign in to their Google account to fill out and submit the form. This can be achieved by enabling any of the following settings:
“General access > Responder view” is set to “Restricted.”
To access this setting, simply click on the hamburger menu at the top right section of the form and change the responder access to “Restricted.” This will force users to sign in to their Google accounts to request access from the owner of the form.

The form has a file upload question.
Adding a question that requires users to upload a file forces them to sign in to their Google account and upload the file to their drive first which may reduce spam submissions.
“Collect email addresses” is set to “Verified.”
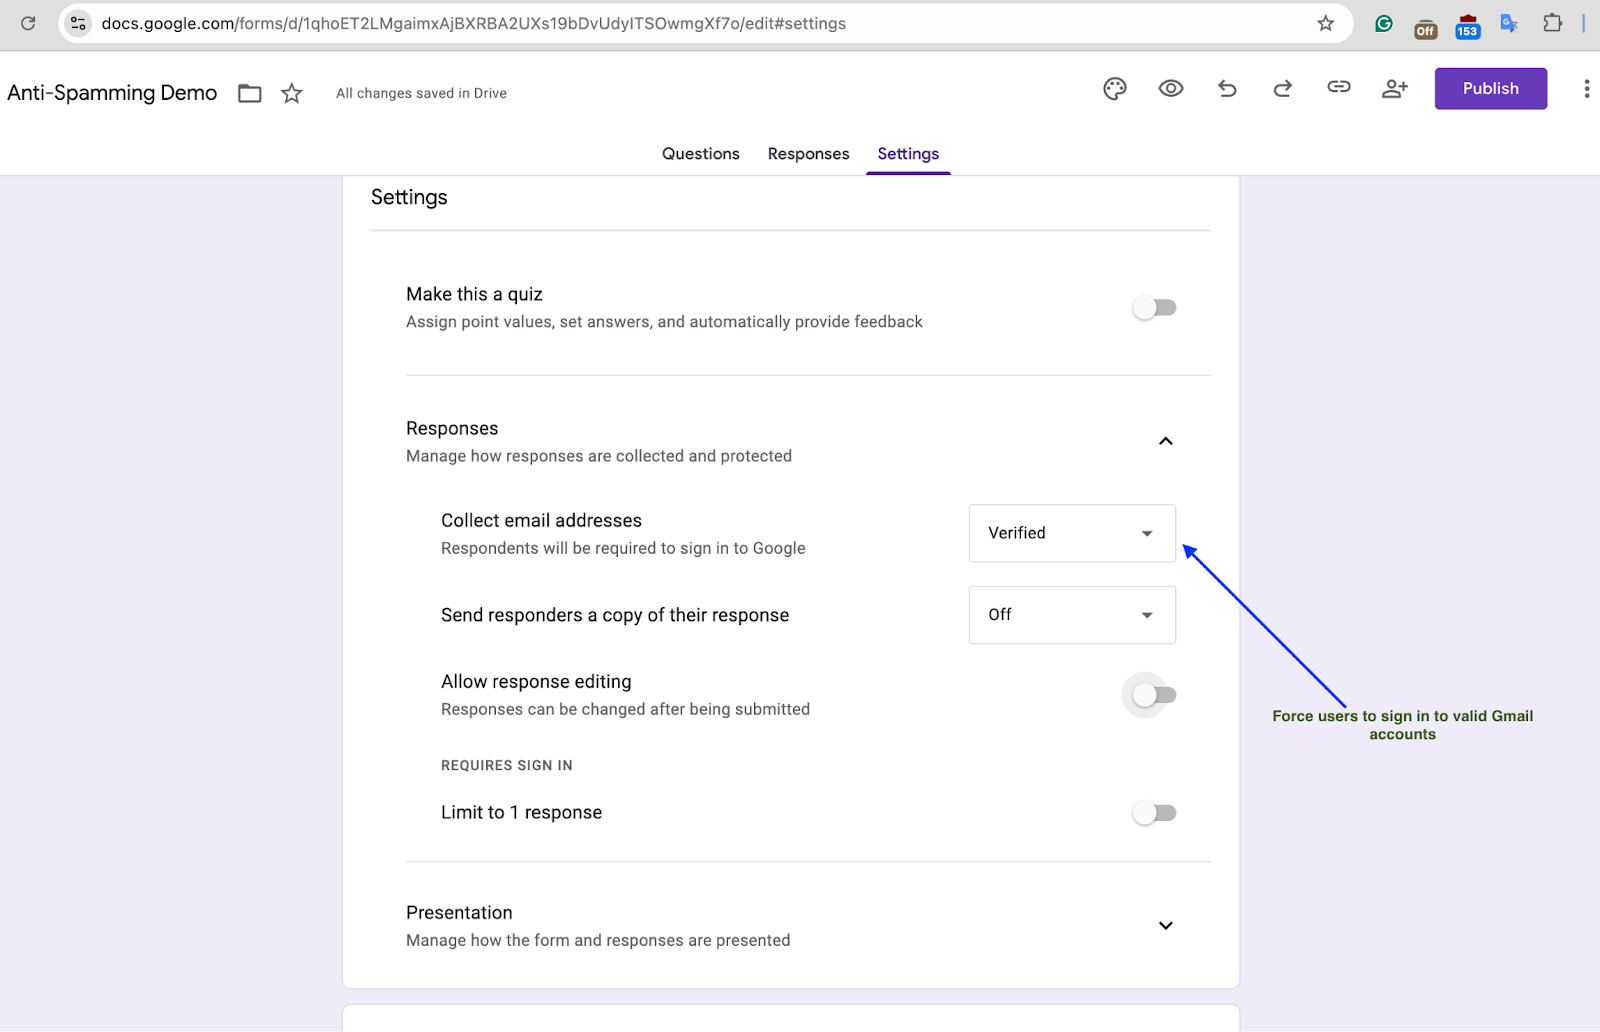
Note: This setting will capture the users’ Gmail/Google email address. CBOs and SJOs should ensure that they implement measures to protect the email addresses collected from unathosied access and misuse.
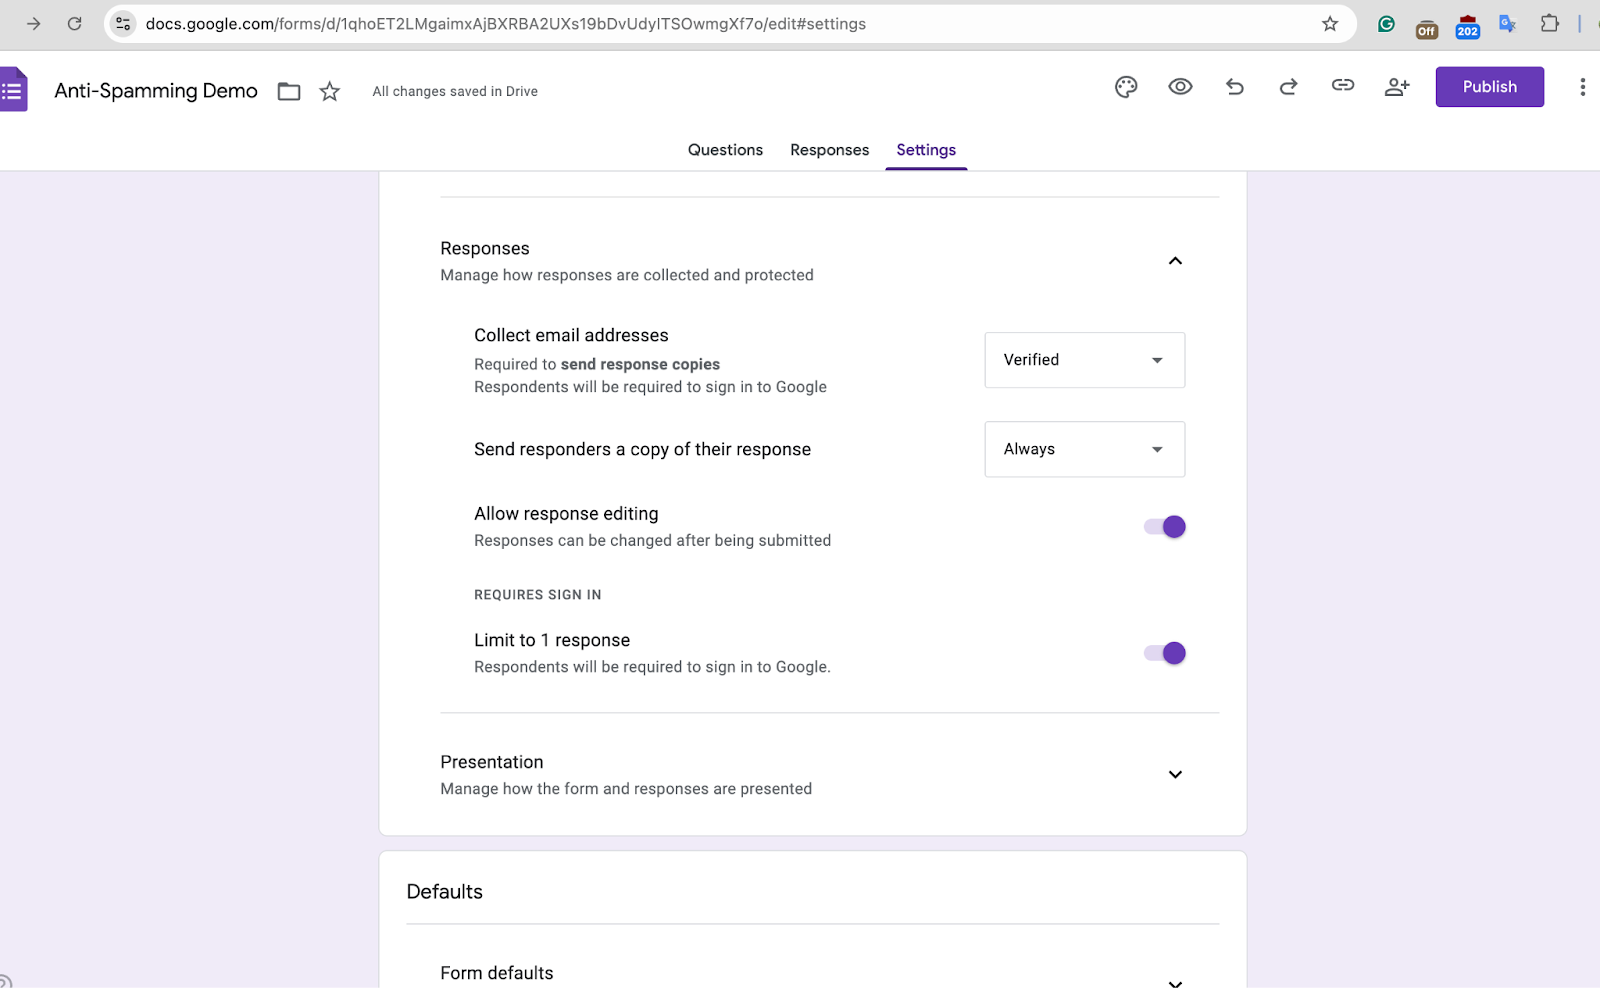
“Allow response editing” is enabled.
“Limit to 1 response” is enabled.
“Send responders a copy of their response” is enabled.
Forcing users to sign in to their Google accounts ensures that only preauthorised people are allowed to fill out and submit the form, therefore reducing spam submissions. However, there’s the risk of wasting time since every user must be granted access manually via email. It may also reduce the number of form responses by restricting participation from those who are unable to access their Google accounts at the time of form submission.
- Add a custom verification question
CBOS and SJOs can achieve this by making the first question of the form a maths challenge or a password-based question. Let’s see how to achieve this:
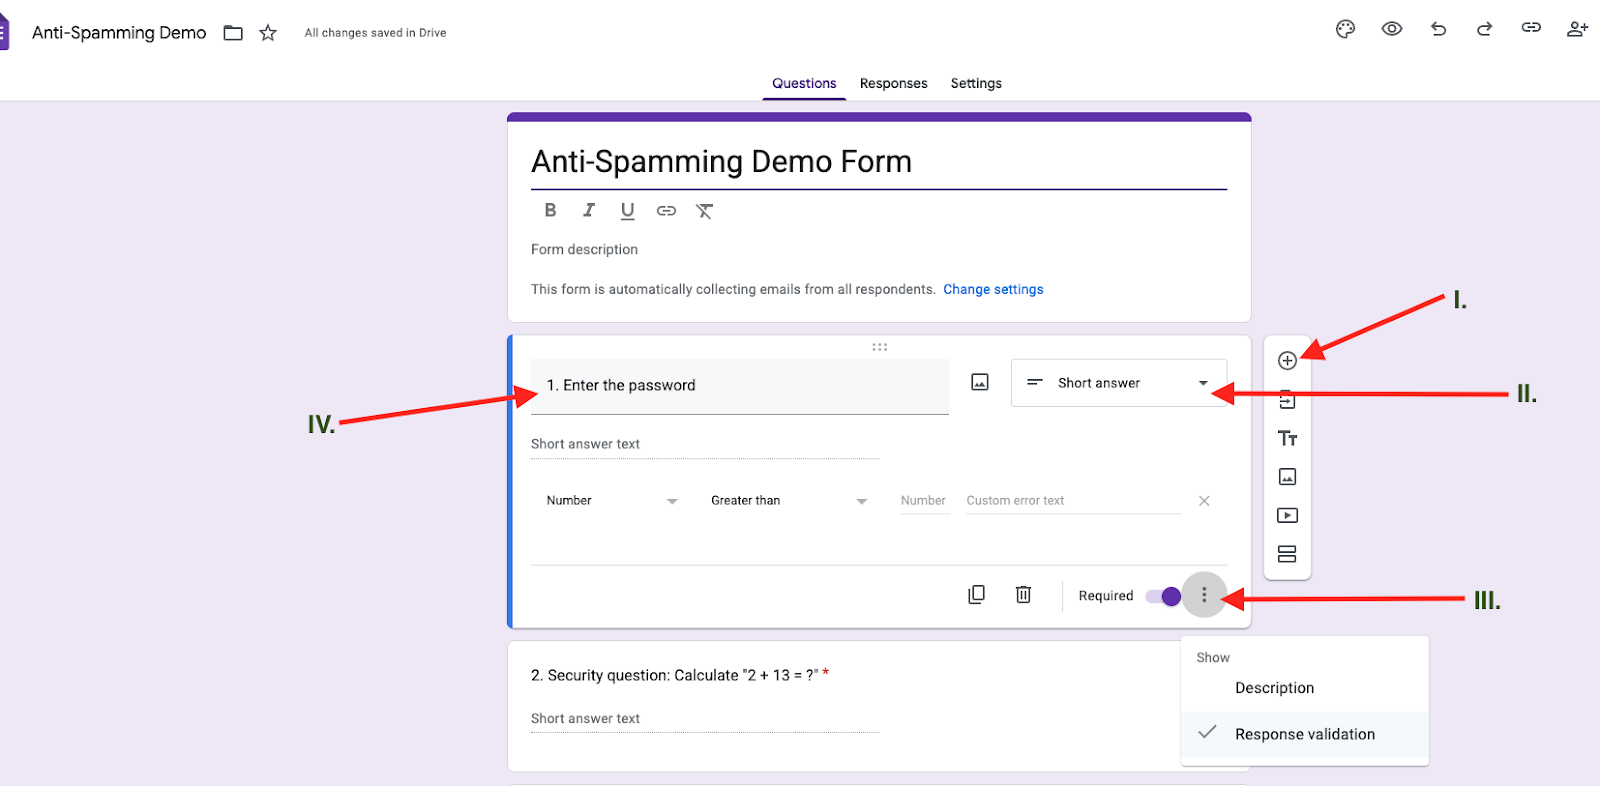
- Click on the plus icon (+) on the right side of the screen. This will add a new question to your form.
- Click on the dropdown menu next to the question field and select “Short answer”.
- In the question field, type something like “Enter the password” to make it clear to users that they need to enter a specific password to proceed.
- Set up response validation. Response validation allows you to set rules for the type of answers your form should accept. You can use it to force users to type their answers in a specific format like email addresse, uppercase letters, or a number within a range. In our first example, we will require users to enter a password and in the second one they will answer a maths question. Click on the three dots in the bottom-right corner of the question box and select “Response validation.”
Using a password response
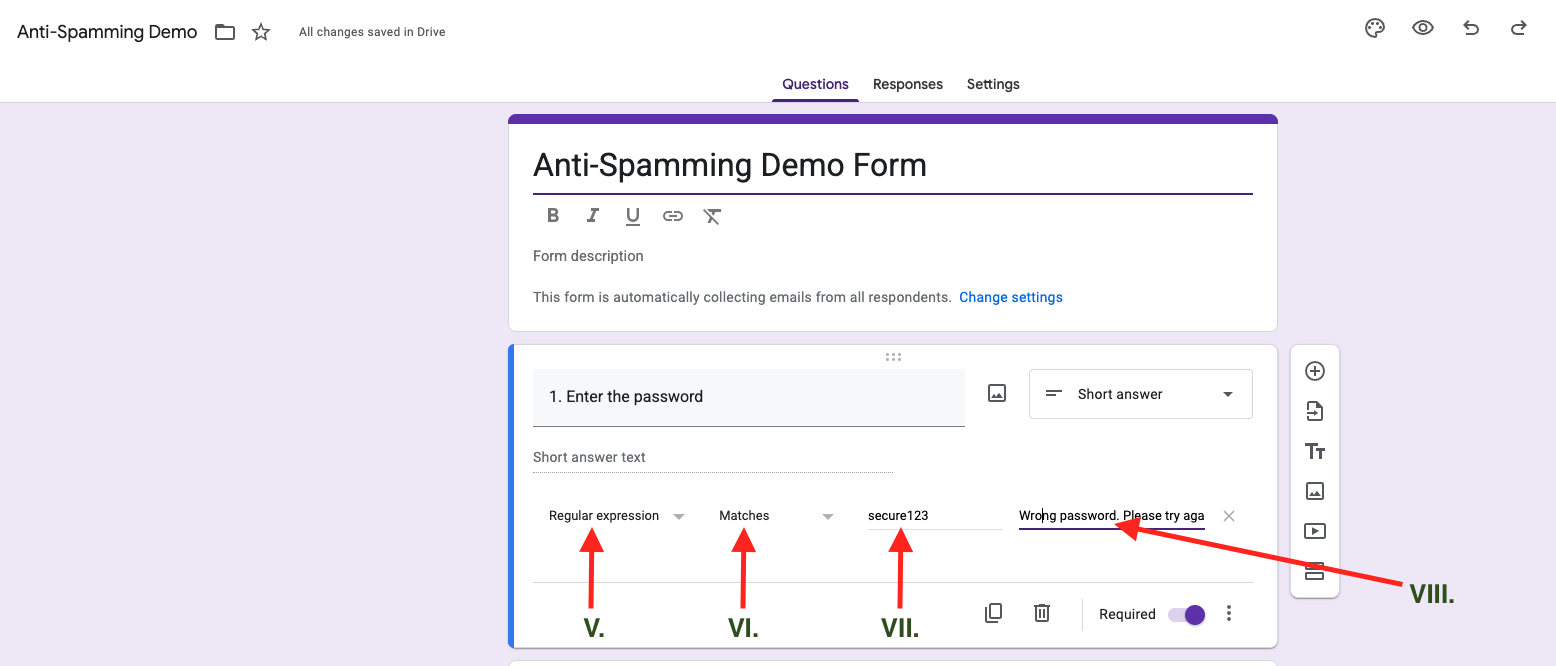
- Choose validation type: In the first dropdown menu, which is set as “Number” by default, select “Regular expression.” This lets you set specific text that users must enter.
- Set matching rule: In the second dropdown menu, which is set as “Greater than” by default, choose “Matches.” This means the users’ answer must match exactly what you specify.
- Enter the password: In the first text box which says “Pattern”, write the password you want users to enter. In this example, our password is “secure123”
- Add a custom error message: After setting up your password, click on the field labeled “Custom error text” and type an error message that users will see if they enter the wrong password.
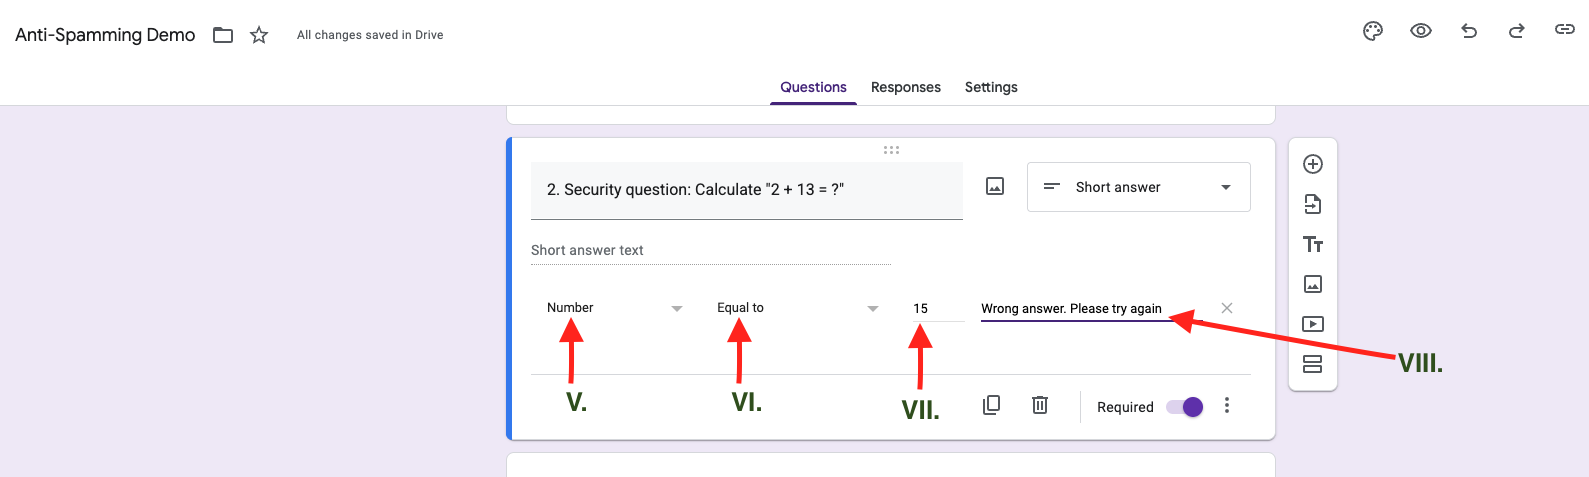
Using a maths response
In case you want users to answer a maths challenge instead of typing a password, follow steps I-IV above then do the following:
- Choose validation type: In the first dropdown menu, leave the setting as it is already set as “Number” by default,
- Set matching rule: In the second dropdown menu, which is set as “Greater than” by default, choose “Equal to.” This means the users’ answer must match exactly what you specify.
- Enter the password: In the first text box which says “Number”, write the answer you want users to enter. In this example, our answer is “15”
- Add a custom error message: After setting up your password, click on the field labeled “Custom error text” and type an error message that users will see if they enter the wrong answer.
Preview and test your form before sharing
Before you share your form, check how it looks and ensure everything works as it should.
Click the eye icon ( 👁) in the top-right corner to open a preview of your form and go through the form as if you were a respondent. Ensure the response validation and custom error messages work as they should. If you find any issues, go back to the form editor and fix them.
Once you’re happy with the form, you can share it with your audience.